Practical
Task 1 - Form Validation
The idea of this exercise is to introduce how to perform basic form validation in an incremental fashion. The process has been broken down into steps, you'll tutor will demo straight the solution to each step after the allotted time. If you're not in the lesson the entire solution will be available in next weeks notes.
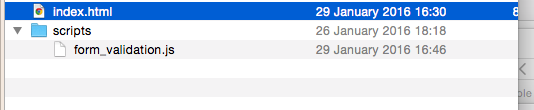
1 Set up folder structure and blank files
Having an organised file structure is vitally important. Luckily, it's also very easy to achieve
Within a new folder create the following project structure:
2 Create a form
Within index.html create a new form with the following <input type="text" fields:
| field name |
|---|
| name |
| age |
| location |
| phone_number |
| address_line_1 |
| post_code |
For the sake of this example let's assume all the fields are required. Beneath each input place a <p> element containing the error message to be displayed if the above input is not filled in.
Note each <p> element should have a unique id attribute e.g.
<p id="errorName" style="display:none"> Required </p>

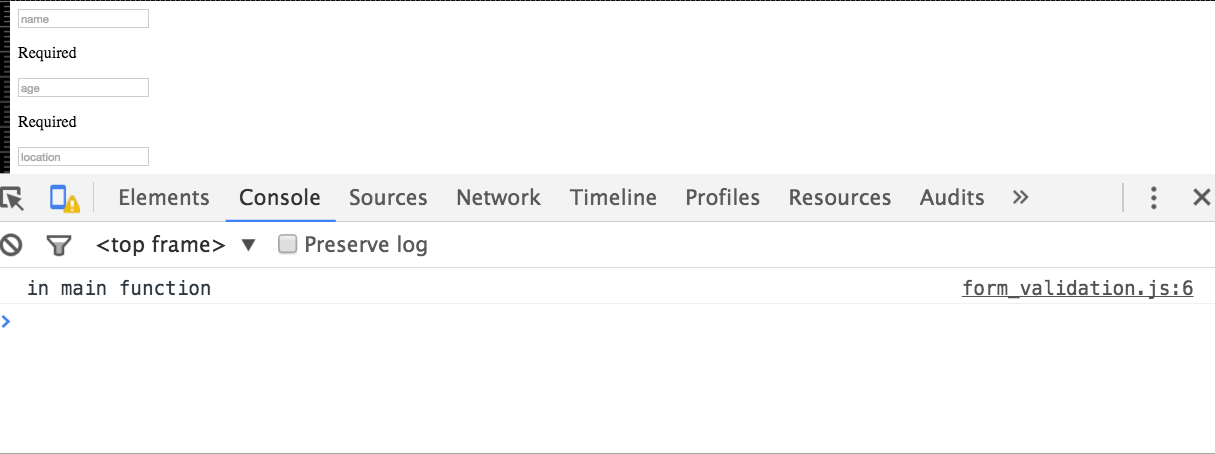
3 Create the <body> onload() event
Within the
<head>of yourindex.htmlpage include your javaScript file.Add a
onloadattribute within your html file's<body>tag that calls themain()function within your javaScript file.Create a
main()function in your javaScript file and to test it's being called when you html file loads addconsole.log("in main function")in yourmain()function.
If all is good you should see "in main function" within the console tab in developer tools:
4 Add a submit event to your form
Add a submit event to your form that calls a function called function validateForm(event). Within the function validateForm add the two lines:
console.log("validating from");
event.preventDefault(event);
Press the submit button and check that validate form is printed to the console.
5 Validate the Form On Submit
Ok, we're nearly there, we just need to actually validate the form when it is submitted. The logic to perform this will be placed in the validate_form function. Below is the pseudo code. Pseudo code is a informal language that allows us to design functionality of our programs. Note,
you need to understand the pseudo code and write the equivalent javaScript
	function validate_form

		Initialise form_valid to true
		if name empty
	        set form_valid to false
	        display name error
	        prevent form from submitting
	    else
	       set form form_valid to true
	       hide name error

	   if location empty
	        set form_valid to false
	        display location error
	        prevent form from submitting
	    else
	        set form form_valid to true
	        hide location error

	   ... continue pattern for all other fields ...
Implement the above functionality using javaScript.
7 Optional Advanced
Research javaScript regular expressions and see if you can also check for a valid phone number and email.
Task 2 - Solent Stores
This task was set last week, however, very few people completed it. As such, I've rolled it over
Solent Stores - Shopping cart exercise
The purpose of this exercise is to extend/improve/finish the solent stores exercise from last week. Once this is done, please work on your assignment
1 Setup
Download the project source file from here. Open up index.html in your browser, you should be presented with the following website:
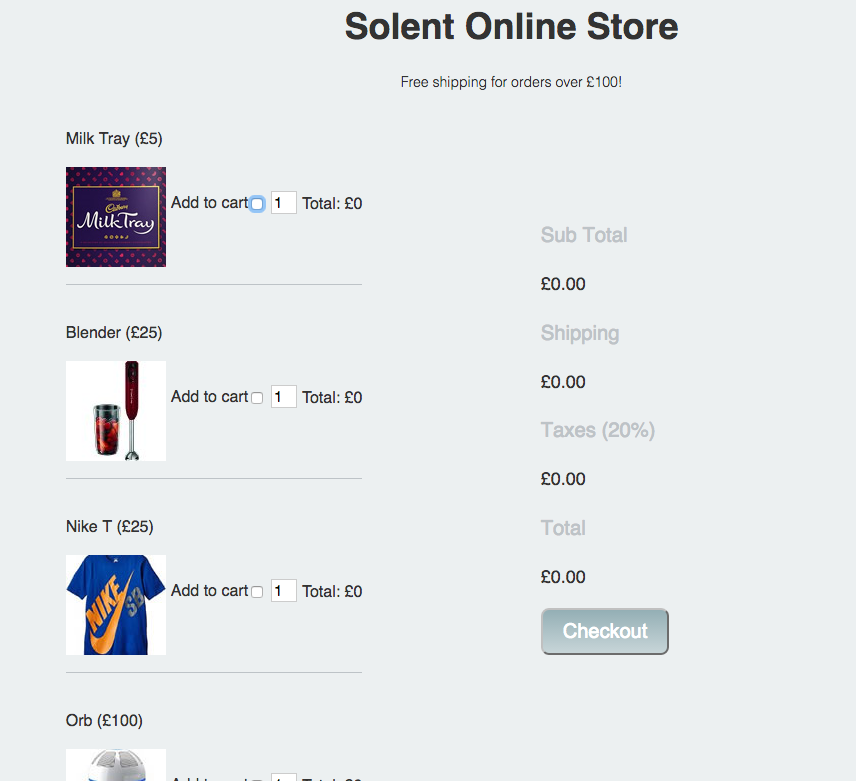
2 Add a data attribute to hold the price of each product
If you take a look at your source code for index.html you'll see that each product has a checkbox for the add to cart functionality. Heres the one for our blender:
<input type="checkbox" name="product" value="blender">
At the a data attribute to hold the of each item. For example, our blender input would become:
<input type="checkbox" name="product" data-price = "25" value="blender">
3 Our first bit of javaScript
Within index.html, notice how we've included an external javaScript file and also added a onLoad event that calls a main() function.
- Open up
script/main.js - Within
main.jsadd an event listener that fires theformChangedFunction - Check that the message is output to the console when the form changes
4 Working out the main totals and shipping costs
- Within
main.jsformChangeFunctioncreate the following variables:
    var form = document.getElementById("productForm");
    var subTotal = 0;
    var shipping = 0;
    var taxes = 0;
    var total = 0;
- Next, within
formChangedFunctionCreate a for loop that loops through theproductcheck list, if a product has been checked you should cast thepriceto a number and add it to the subtotal. This is very similar to our the example in the notes.
    numberTotal =  parseInt(form.product[i].dataset.price);
    subTotal = subTotal +  numberTotal;
how to access the price from within the loop
Note, this is very similar to the in class example.
- After the loop, check to see if the
subTotalis less than £100. If this is the case, setshipping = £10 - Set the variable
taxes = 20% of subTotal - Set the variable
total = subTotal + taxes + shipping - Set the inner HTML of each section in the summary table = to your new variable values:
document.getElementById("sub-total").innerHTML =  "£" + subTotal;
document.getElementById("shipping").innerHTML =  "£" + shipping;
document.getElementById("taxes").innerHTML =  "£" + taxes;
document.getElementById("total").innerHTML = "£" + total;
5 Product totals and multiple items
Implement the functionality to allow the amount of each product to be increased. The total for each product should be displayed. This is tricky, but let's take the blender as an example and consider its related elements:
<input data-price="25" type="checkbox" name="product" value="blender">
<input type="number"  value="1" name="blender-quantity">
<p>Total: <span  id="blender-total"> £0 </span> </p>
This naming convention is consistent for all the products, your solution will take advantage of this.
6 Add real time form validation
The quantity box should go red if a number is entered below 0 or above 100.
7 Add a order summary
Above the checkout button add a order summary. This should be a list of items that have been selected in human readable form. It should be updated in real-time. To achieve this you'll need to add a desc attribute to each of you of your check boxes:
`<input type="checkbox" name="product" data-desc="Milk Tray" value="mt">`